|
This process configures the automated backup features built in to Genie Server. Once configured, your Genie data files (i.e. Genie.4DD, Genie.4DR, and any Genie<N>.4DS files) will be saved as a one or more backup files:
| • | If you have less than 2GB of data, the backup file will be called Genie[XXXX].4BK. |
| • | If you have more than 2GB of data, there will be two or more backup files (each file holds up to 2GB of data). These files are named Genie[XXXX-0001].4BK, Genie[XXXX-0002].4BK, etc. |
The "XXXX" above represents the backup run number (a sequential number that increments with each backup run), i.e. 0001, 0002, etc.
Note: This procedure does NOT backup your Images folder. You must back up your Images folder separately.
The images folder can be found in the following locations:
On Windows the images folder should be found at: C:\Genie\Images on the SERVER, assuming that Genie is installed in the default location. It may be installed on a different drive on your computer.
On Macintosh the images folder should be found at: /Applications/Genie/Images on the SERVER, assuming that Genie is installed in the default location. It may be installed on a different drive on your computer.
Important: Due to the nature of this procedure, the most computer literate person in your practice should follow these instructions. While simple to follow, the implications of getting this wrong can be devastating.
On your Genie Server:
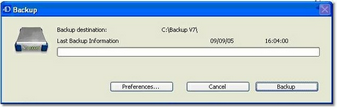
| 1. | From the File menu select "Backup" i.e. . The following window should open: |
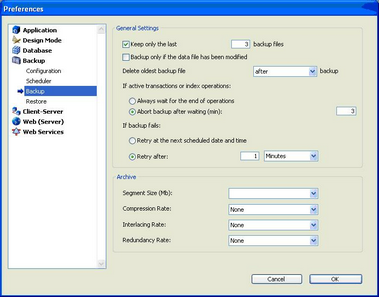
| 2. | Click the Preferences button. The following window should appear: |
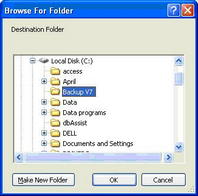
| 3. | Set up as above and then select the folder which will store your back up data file by clicking on the button with three dots in the Backup File Destination Folder section. A browse window will appear, as shown below, from which you can navigate to and choose a folder in which to save the backup files. |
| 4. | Access the scheduler options by clicking the Scheduler menu item on the left under configuration. In the window displayed below, enter appropriate settings for your practice. |

| 5. | Access the back up preferences by selecting the Backup menu item on the left. The settings shown below are suitable for most practices. |

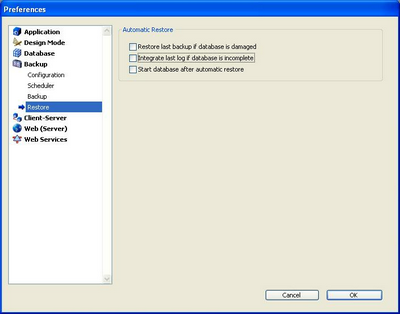
| 6. | Access the Restore settings by clicking the menu item on the left. Ensure the three tick boxes are unchecked. |
| 7. | Click the OK button to save these settings. |
| 8. | Click the Backup button to start the initial backup. A progress window will appear. |
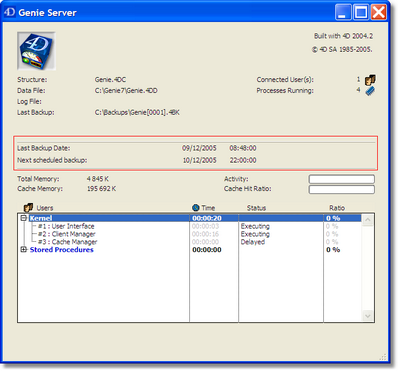
| 9. | Once this process has completed you will be returned to the main Genie Server window. The next scheduled backup time should be displayed in this window. |
|


