Ordering Pathology


|
Ordering Pathology |
|
|
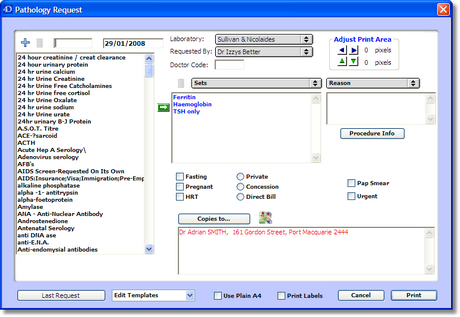
To order pathology click the Pathology
Select the Pathology laboratory you wish to send the patient to using the Laboratory drop down list at the top of the window. Pathology laboratories can be added by selecting New Provider... from this list. You can set the default provider i.e. the company you refer to most by selecting Set Default... and double clicking the laboratory you require.
Doctor Code: is set by the laboratory and only needs to be entered once and Genie will remember it for that company.
Note: Once you have added the Pathology company, you cannot change the details associated with it, ie. laboratory, address and telephone. If these details change, delete the provider from the list (ALT + Click on the entry to be deleted) and then re-add the Pathology Company with the new details.
To order a test from the list of tests at left either scroll through and find the test you need or type the test into the blank box at the top of the list to find it. Double click the required test or use the green arrow or drag and drop the test into the request box under the Sets drop down list.
If the test is not in the list at left you can add it with the Blue Plus button. Tests that you may never use can be deleted altogether by highlighting the test and clicking the Garbage Can button at the top of the list.
If you have added a test to the list of requested tests by mistake, highlight the test and click the Garbage Can button next to the Sets drop down list.
A reason for the test can be added via the Reason drop down menu. Alternatively, you can use the Procedure Info button to automatically insert the name and date of the patient's last Procedure into the Reason field.
Copies will automatically be sent to the referring doctor if Copy Results to Referrer is ticked in your User Preferences (File > User Preferences). Otherwise, copies can be sent to any doctor/s in your Address Book by clicking the Copies to... button.
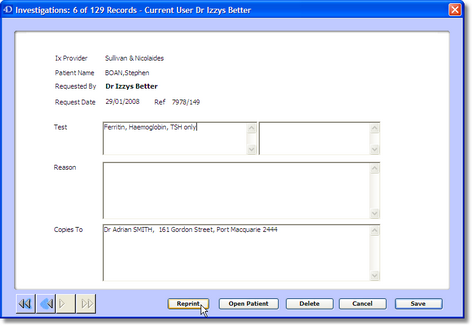
If your pathology stationary has labels on it, tick the Print Labels tickbox which will format the request to print the patient information on these labels. Reprinting Request Forms Request forms can be reprinted through Open > Investigations Audit. Find the request that needs to be reprinted, double click to open the request window and click the Reprint button at the bottom of this window.
Creating Pathology Sets For commonly ordered sets of tests you can create a Pathology Set so you will only need to select the Set from the Sets drop down list and it will slot in the appropriate tests you have set up. There are quite a few default Sets already set up in the drop down list which can be deleted or modified as appropriate.
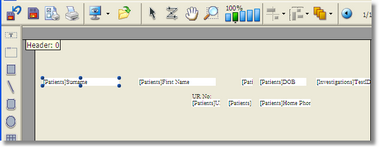
To create a set, drag all required tests for the set into the request box. Select Save Set... from the Sets drop down list and give the Set a name as prompted. Pathology Templates If a pathology template needs to be moved in any direction as a whole, use the green/blue arrows at top right.
To adjust individual field in a pathology template click the Edit Templates drop down menu and select the template to edit (usually Standard Preprinted).
Fields can be moved by clicking and dragging them to the desired position and resized by dragging the blue dots accordingly.
To remove a field from a template, click and drag it off the printable area.
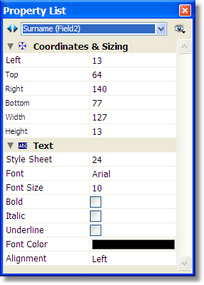
To edit the Text Properties in a field, double click and a Properties list will appear with options to adjust the Style and Size etc. of the text.
Be sure to Save the Template before closing using the Save |