Creating a Checklist


|
Creating a Checklist |
|
|
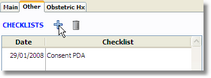
To create a checklist:
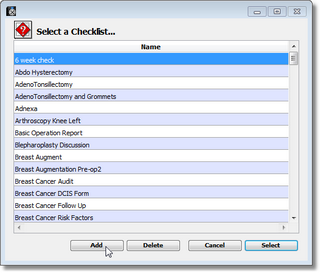
This displays a list of available checklist templates:
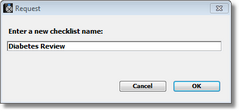
Note: The name of the checklist cannot contain unusual characters, i.e. ?,/,\, <,>.)
Note: Text fields cannot contain unusual characters, i.e. ? / \ < > , . @ ( )
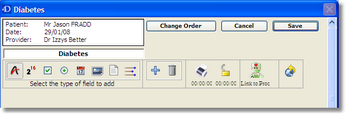
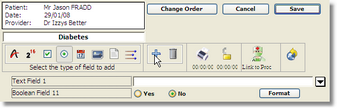
To add a field, click on the field required, then click the Blue Plus sign.
e.g. To add a text field, click on the Text button, then click the Add button (blue plus sign). You will see that a text field is added to the form. On the right of this field is a popup menu which allows you to add any number of items for faster data entry into the field.
Click on the Field label Text Field 1, and enter the label you would like displayed. For example if you are creating a template for taking a headache history, the first label might be “Frequency”. The popup menu would contain daily, weekly, monthly, all the time, etc.
Radio buttons can also be formatted. The default is “Yes” and “No”, but this can be changed by clicking on the Format button. Locking a Checklist To the right of the Print button is a button which signifies if the checklist is locked or not.
You would normally only lock a checklist if you wanted it to become a medico-legally valid record eg.an operation report. Once a checklist has been locked it can no longer be edited, although it can still be deleted.
Note: The original template can be changed. It is only the checklist for their particular patient that is locked. Uploading a Checklist Template Once you have created a template you can upload it to the Genie Solutions FTP site so that other Genie users may download and use your template themselves. You can upload a Checklist template by clicking on the Upload Template
Conversely, you can download templates created by other Genie users. You can do this by selecting Get Checklists from the Special menu i.e. Special > Get Checklists.
This will take you the the FTP site where checklists are grouped under Specialties. Just double-click on the one you want and it will be downloaded directly into your data file for immediate use.
Note: You shouldn’t have a checklist open when you do this. |