Matching and Linking Results to Patients


|
Matching and Linking Results to Patients |
|
|
Select Open > Pathology & Radiology and select your name from the Doctor drop down menu.
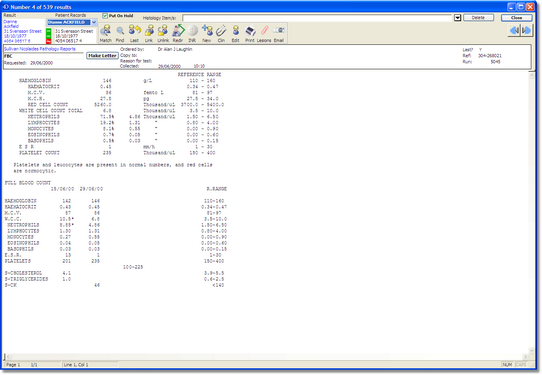
Double-click on the first record in the list to open and view the actual result.
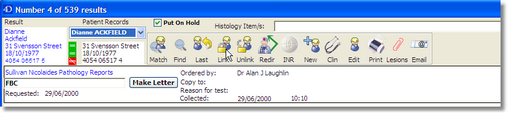
In the top left of the screen, in blue, is the patient's demographic information as held by the Lab. Just to the right is the information held in the Genie database.
As the record opens, Genie attempts to match it to an existing patient record. The initial search is made on Surname and the first 3 letters of the First Name.
If one patient record found: If BOTH the Medicare No AND the DOB don’t match, then Genie assumes that this is the wrong patient with the same name, and so then searches just by DOB.
If more than one patients found: Genie searches the found records for a matching DOB. If it doesn’t find any match, then it reverts to displaying the records found by the original search, and puts them all in the drop down
No patients found: Genie does a second search by DOB and the last 3 letters of the surname
If at the end of all this, there is more than one matching record, Genie puts them in the dropdown menu and then loops through them until it finds someone with either a matching address, DOB, or Medicare No.
If it doesn't find a good match, then no patient information will be displayed.
In the above case it has found a matching patient record in the database, however there is a mismatch with the address and Medicare number. This is a fairly frequent occurrence, particularly when Medicare cards are re-issued. The last digit of the Medicare number is the issue number.
When this happens, you can simply drag the Medicare number from the lab's information onto the Medicare number of the Genie database to automatically update the Genie data. You can do the same with the address and Date of Birth, assuming you are happy that the lab has got it right and that you are wrong! If Genie has not found an automatic match when the result is displayed, you should click on the Match
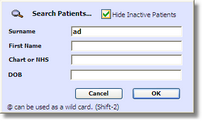
As with all searches, the less you type in, the more likely you are to find the correct record, particularly if there is a spelling mistake in the name. You could also just search on the First name if you suspect the Surname has been spelt incorrectly.
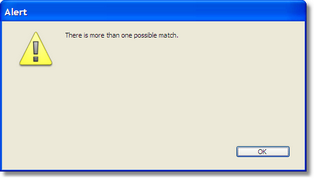
If this search finds more than one matching record, you will be warned of the fact.
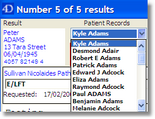
In this case, all the matching names will be held in the Name popup, allowing you to scroll through and hopefully find the correct patient.
If you still cannot find the patient in your database then you can create a new patient record using the New button
Once you have a good match, click on the Link button
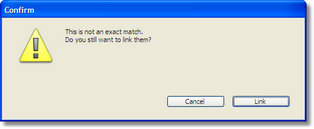
If you get the below message it means that either the Address, DOB, or Medicare Number do not match as indicated by the red ≠ sign.
You can choose to fix the information or Link anyway.
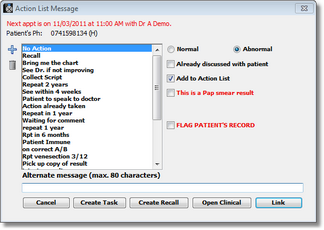
The Action List window will open.
This window allows you to select the message for the Receptionist to tell the patient when they call, or the action you want the receptionist to take now.
This list is modifiable. You can Add and Delete items from the list using the buttons down the side of the list window.
You can also re-sort the list by dragging and dropping items within the list.
The Alternative message field allows for free text entries, up to 80 characters in length.
You can also change the Normal/Abnormal marking if you disagree with the lab's decision.
The Add to Action List checkbox is checked by default if you have selected the Move to Action List after linking checkbox in your User Preferences (File > User Preferences). This means that the result will be moved to the Action List after linking so that the receptionist/practice nurse can go through the Action List taking whatever action necessary for each result (see Pathology Recalls (Investigation Action List) for more information). You can tell if the requested action has been taken when in a patients clinical file by looking to see if the Notification column has a [N] in it in the Contacts list.
If you don't use the Action List deselect the checkbox in your User Preferences.
If the This is a Pap Smear Result checkbox is ticked, an extra drop down menu will appear directly below. This allows for the entry of the smear result. This smear result and the test date is then automatically inserted into the Last Pap field in the patients clinical record.Whenever a result is linked Genie searches the text looking for the words "smear" and "endocervical". If it finds either of these words then this checkbox will be automatically ticked. However, sometimes, it may get it wrong and either misidentify a result as a Pap Smear or else not recognise a result as a Pap Smear result. In this case you can manually select or deselect this checkbox.
The Flag Patient's Record checkbox is used when you want to ensure that a recalled patient actually turns up within a certain period of time. When the clinical record is next opened you are given the opportunity to unflag the patient, however if the patient doesn't turn up, then presumably the clinical record won't be opened and unflagged and Genie will start warning you once the due date has passed, whenever the program is launched (see Flagging of Patient Record for more information).
The patients next appointment will automatically be displayed in red, noting the doctor they are booked in to see, date and time of this appointment. If the patient does not have a future appointment, then you will be notified of this.
The Create Task button allows you to create a task for the patient regarding the pathology result. When the task window opens, the title of the task contains the words 'path result' and the patients name. The body of the task contains the name of the pathology tests and the test date. Additionally, this task is automatically linked to the patients clinical record.
The Create Recall button allows you to create a proper Recall record rather than just asking the receptionist to recall now in the Action List. You would usually do this when the recall isn't urgent but you want to repeat the test in 3 months for example.
Click the Link button to link this result to the patient.
Genie will then display the next result in the list until you reach the last one. Incorrectly Linked Results If you have linked a Pathology/Radiology Result to the wrong patient, you can unlink this result and then link the result to the correct patient by going to Open > Pathology & Radiology and using the 'Linked?' drop down menu, and select 'Linked'.
This will display a list of all patients who have Pathology/Radiology results linked to their records.
Identify the patient who has the incorrectly linked result, and double click on the result. Click on the Unlink |