The Patients Menu


|
The Patients Menu |
|
|
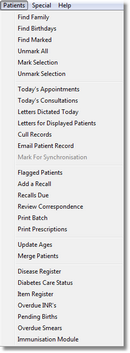
The Patients menu is only available when the Patients List is open.
Find Family This allows you to highlight one patient record and find other family members. The other family members must have the same Account ID as the original patient. That is, they all have the same Account Holder.
Holding down the ALT key whilst selecting this menu item will display patients with the same Chart Number.
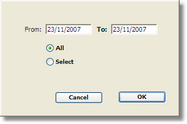
Holding down the Ctrl key whilst selecting this menu item will display patients with the same Medicare Number. Find Birthdays Displays patients whose birthdays fall within a specified date range. Find Marked, Unmark All Mark Selection & Unmarked Selection There is a field named Marked in each Patient record. It is a simple tick box which can be used for any purpose you like.
These three commands can be useful during searches where you need to perform multiple searches on the patient database.
After you have found a particular group of patients you may want to mark them using Patients > Mark Selection.
This will give the Marked field a value of TRUE for all the displayed records. This allows you to come back at a later time and find them again quickly using Patients > Find Marked.
Or you may want to perform a search where:
Note: Before using the Marked field as a Search parameter, you should first select Unmark All in case there are records already marked from a previous search. Todays Appointments Displays a list of patients who have an appointment on a date specified by you. This list can be used to aid in typing reply letters. Todays Consultations This will display a list of patients who have consultation records on a date specified by you.
The next window displays a list of patients with the date of the last letter back to their referring doctor if applicable.
The Letter Dictated box will be ticked if the doctor ticked this in the consult window (see Adding Consultation Notes). It will also display whether the letter has been Reviewed/Printed (see Reviewing Correspondence) and whether it has been sent successfully via a third party, if applicable.
Clicking on the Patients List button will display these records in the Patient List, allowing you to examine each one if desired. Letters Dictated Today Displays a list of patients who have had a consultation and a letter dictated (as governed by the Letter Dictated box being ticked in the consultation note) on the date specified. This aids in management of typing dictated reply letters.
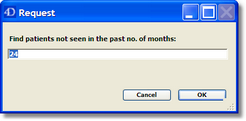
Letters for Displayed Patients Cull Records This will find all patient records who have not been seen within a certain time period. You will be prompted for this time period.
This search is made using the Last Opened field. This field is given the value of the current date whenever the Clinical window is opened and saved, or the patient is invoiced.
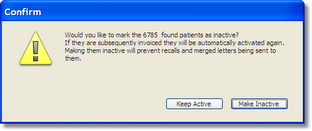
If any patient records are found, Genie will offer to mark them as Inactive, by giving the Inactive field a value of TRUE. You can subsequently search on this field again to find all your inactive patients and perhaps delete them.
Note: Genie will NEVER delete the records automatically.
In addition it is not possible to delete patient records with attached consultation notes or any billing. Therefore, once you have a list of all the inactive patients displayed, you can highlight them all by selecting Edit > Select All, and then clicking on the Delete button. Genie will only delete those patient records which have no billing or notes attached. Email Patient Record Note: The Email Module must be setup in Genie in order for you to be able to Email Patient Records.
This item allows you to email the entire clinical record of the highlighted patient, to another Genie user. It will create an email in Genie’s email module’s Out Box. The Subject is “Genie Transfer*-Record of X”.
When the intended recipient downloads the email into Genie, the attachments are automatically moved into a folder called “Export” within the Genie folder.
If you are the recipient of an email with a subject, such as the above,you can import the patient record by opening the Patients list, selecting File > Import, and clicking on the Genie Format button.
If you have downloaded the email into another email program, then you can still import it by creating a folder called “Export” in the Genie folder, and then saving the attachments into this folder.
This method could be used as part of a referral to a specialist, or to transfer a patient record from one data file to a remote data file used by someone in the same practice. Limitations:
Flagged Patients Displays all patients who have been flagged, whether or not they are currently over-due for their flagged visit.
You can right click on a patient to unflag them or to access their clinical file Add a Recall and Recalls Due See the chapter on Recalls for information. Review Correspondence See the chapter on Review Correspondence for information. Print Batch See the chapter on Prescribing for information. Print Prescriptions This allows you to print certain prescriptions for a group of people eg. antibiotics for post surgery. Find the people you want to print the scripts for, so that only those patients are on display. Once you select this item it will ask which scripts you would like to print for the selected patients. The list you are presented with is the list of scripts you have in your QuickScript menu. Update Ages Updates the patient Age field for each of the displayed patient records. The Age field is automatically calculated from the Date of Birth when a patient record is created and is updated whenever the Demographic or Clinical windows is opened.
Note: If a patient hasn’t been seen for some time, their recorded age will be incorrect. If you perform a search based on ages then the results of your search will be inaccurate unless you perform this function first. Merge Patients If you find you have inadvertently created two records for the one patient, highlight the two duplicate records and then select Merge Patients. The information from the two records will be merged into one record. This procedure will also combine all images and scanned documents for the two patients.
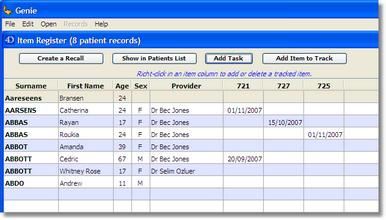
Note: To highlight two records, click on the first record and then either Shift-Click or Command-Click on the second, so that both records remain highlighted. Disease Register Opens the Disease Register Module. See Disease Register in the Clinical module for more information. Diabetes Care Status See Diabetes Care Status in the Clinical module for more information Item Register Opens the Item Register Module for the patients on display in the Patients List. The Item Register allows for the easy monitoring and tracking of how many times a patient has been billed a tracked item number. It is particularly handy for items such as GP Management Plan items that can only be billed once a year. If searching for certain patients only eg. >75years old then you would need to do the search in Open > Patients, Records > Search first, before going to Patients > Item Register.
The Create a Recall button allows you to create a recall record for the highlighted patient.
The Show in Patients List button displays the highlighted patients records in the Patients window.
The Add Task button allows you to add a new task for the selected patient.
The Add Item to Track button allows you to add item numbers to the Register in order for them to be tracked. Alternatively, you can right click in the column of an item number and add or delete items.
The date provided for each tracked item number refers to the last time this item number was billed to that patient. The Item Register is particularly useful for allowing you to quickly see when a particular patient was last billed that item number. Overdue INR's Displays a list of patients that are overdue for their INR. This is determined by the date that is entered in the Next Test date field in the INR Control window in the clinical window (Tools > INR Control) Pending Births Displays all pending deliveries, based on records in the Pregnancies table. the pregnancies are displayed by month (clicking on the month will display a drop down list allowing you to switch to a different month) and can be viewed for one or all doctors in a practice. You can access a patients Pregnancy record by double clicking on the patients name.
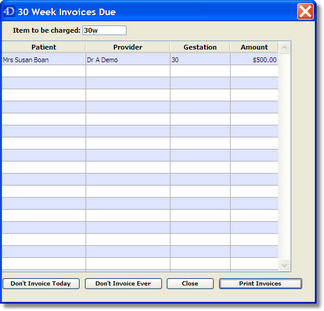
Clicking the 20 wks Due or 30 wks Due button will open a window displaying all patients who are either 18-22 or 28-32 weeks pregnant respectively, allowing you to send out the relevant invoice.
In order to generate an automated 20 or 30 week invoice, a fee needs to be entered into the Pregnancy record in the 'Out of Pocket Expense' field in the 'Current Pregnancy' tab. The calculation of the 20 and 30 week invoices are based on the Agreed EDD field. If no fees are entered into the 20 and 30 week fee fields, then Genie will automatically calculate them at two-thirds and one-third respectively. Alternatively, you can enter the fees you wish to charge into these fields.
You can create your 20/30 week item numbers in Open>Billing Items by clicking on the blue plus to add a new item. Only an item number (eg. 20W & 30W) and description are required if you are splitting the fee 1/3, 2/3 otherwise enter the specified fee in private fee field. Alternatively, you can use the Medicare item eg. 15999.
You can allocate these item numbers through the Invoices Due window by clicking in the Item Number column and typing the relevant items for 20 and 30 week fees beside the appropriate invoice. This only needs to be done once.
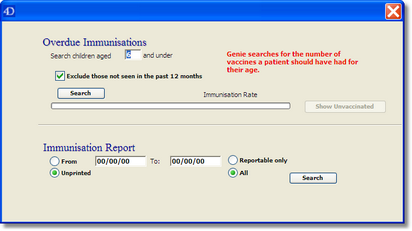
Note: Unless the patient is between 18 and 22 weeks pregnant or 28 and 32 weeks pregnant, the invoices will not appear when the 20 wks Due or 30 wks Due buttons are clicked on. Overdue Smears Displays all females aged between 20 and 70 (exclusive), who have not been marked as Inactive, and who have not been marked as Don't Recall for smears in the Clinical window, and who have not had a recorded pap smear in the past 2 years. For Pap Smears that need to be recalled more frequently than every two years, use the Recall system.
Note: You need to be either downloading pap smear results electronically, or be manually entering the dates of pap smears in the clinical record. Immunisation Module This opens the Immunisation window allowing you to track your immunisation rate and produce an ACIR report.
|