Batch Processing


|
Batch Processing |
|
|
If you have multiple documents for multiple patients to scan, the procedure outlined below is highly recommended and will yield considerable time savings.
Note: While this section has been written with scanning in mind, the procedure applies for other types of documents such as digital photographs etc. Configuration Note: Each client machine that will be scanning or processing (uploading) documents needs to complete these configuration steps:
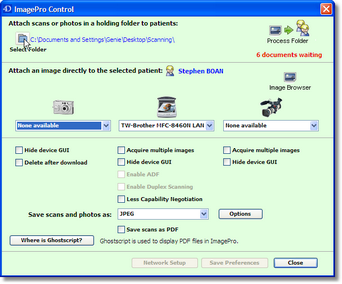
You can then scan your documents into the Holding Folder using your scanners software independent of Genie. As Genie has no impact on how the scanned document is captured, you need to set the desired image format and quality from within the scanner’s own software i.e. the options set in Genie for Ad Hoc scanning will have no effect. JPEG or black and white TIFF, with a resolution of about 150 dpi are usually best at keeping your image size below 100KB. Importing Scans Once a bundle of documents have been scanned to the holding folder, the next step is to import them into Genie so they can be accessed from the clinical record. To import the scans into Genie:
Preview Images needs to be ticked if you want to be able to preview the images in the preview pane on the right.
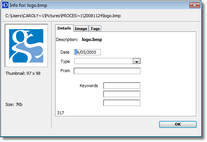
Open Info Window When Processing will open the below info window for all images so further detail about the image can be added when processing.
Use Patients Subfolders allows you to select which of the patients subfolders you want an image to go into when processing the images. eg. Op Photos, Referrals etc. These are added through the patients Image Browser window. For more information on adding subfolders refer to Viewing Images in the Clinical Module.
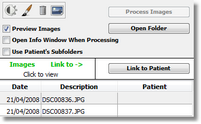
To view an image, click once on the name of the scan. You can zoom in on a scan simply by clicking on the displayed image, and zoom out by Shift-clicking. If for some reason the image will not display in the display area simply double click on the Description of the image and it will open the image in a separate window.
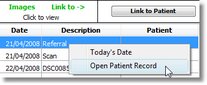
2. To change the date of the image, (e.g. to the date of the referral letter) slow double click in the Date column. You can right click to change the date to today's date for one image or all images in the list.
3. To rename the image, slow double click in the Description column. The name of an image is for display purposes only in Genie, it does not change the original name of the file on the Server. For this reason, images can be named using any type or amount of characters, and the same image name can be used for more than one patient.
4. To attach a single image to a patient, double click in the Patient column next to the image name. If you have multiple images that you need attach to the same patient, you can highlight the images using Ctrl-click or Shift-click, then click the Link to Patient button.
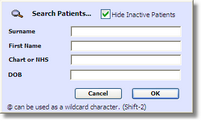
5. You will be presented with a Search window to allow you to specify the patient to whom this image/s belongs. If you link an image to the wrong patient you can unlink this image by double clicking on linked images name and choosing 'unlink' when prompted. This will allow you to then link this image to the correct patient.
If you right click on the patient's name you can open their clinical file for reference.
6. Once you have finished assigning the scanned documents to the relevant patients, click on the Process Images button. Genie will process each image, copying each one to the appropriate patient folder on the server.
As the scanned documents are processed, Genie moves the original file into a folder called “Processed” which is automatically created within the Holding Folder. These can subsequently be deleted manually if you wish.
The buttons at the top of this window allow you to apply filters, show more information, rename, draw and annotate on images, delete, and open the Image Browser window for the highlighted patient. |