Viewing Images


|
Viewing Images |
|
|
The Image Browser window displays the contents of the selected patient's folder on the server. It can be opened where you see this button Button Description
The Blue Plus button allows you to add an image stored on your hard disk to the selected patient's folder.
The Filter Image button allows you to apply a variety of changes to an image such as Contrast, Brightness, Hue, Saturation and RGB Balance. The Information button opens a window which stores information about the image, including the size, camera information, type and source of the picture. If you assign the Type as "Mugshot" and have the 'Display Patient Mugshot' option ticked in File > User Preferences, this photo will be displayed when the patient's demographics or clinical window is opened. You can also assign up to three keywords so that you can subsequently find everybody for whom you have a photo of a melanoma for example (see Search for Attachments and Images)
The Rename button allows you to rename the image.
The Drawing button opens the image in the drawing module, allowing you to draw on and annotate the image.
Note: These changes actually become part of the image and therefore are permanent. You cannot subsequently delete your annotations.
The Garbage Can button will delete the image permanently from the Server.
Note: If the selected item is a document rather than an image, all the above buttons will be disabled except for the Delete and Rename buttons.
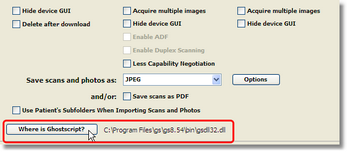
The Acrobat button will open a selected PDF in Acrobat Reader. PDF's can be viewed without Acrobat on Windows machines with the aid of a freeware program called GPL Ghostscript. This can be downloaded from http://www.cs.wisc.edu/~ghost/. 1. Click on the most recent link for GPL Ghostscript 2. A new window will open, scroll down to the Microsoft Windows heading and select the .exe file for 32-bit Windows which will be named something like gs864w32.exe. 3. Save this file and then run the executable from the location you saved it to, accepting the default settings.
Once you have run the installer, open the ImagePro Control Window and click on the Where is Ghostscript button in Preferences. Navigate to the gsdll32.dll file which will be located at C:\Program Files\gs\gs8.xx\bin\gsdll32 if you accepted the default installation, where 'xx' is the version number of Ghostscript that you downloaded.
After you restart Genie you will be able to view PDFs directly in the Image Browser window.
Note: These files can be very large, so it's not a particularly useful feature!
Note: You can't drag items from the Album list. To combine album images, you first need to click the Use Album button and then drag the desired files to the Multi-TIFF window.
The created TIFF file is automatically placed in the same folder as the original files. The original files are untouched. If you want to delete them you must do so manually. Organising Images: The Image Browser window allows you to organise patient images and attachments into a folder hierarchy. Folders can be added or deleted, and images dragged into them. Doing this actually creates the folders on the server machine and moves the images around on the server.
To add or delete folders, click on the Blue Plus icon, or the Garbage Can icon, see below.
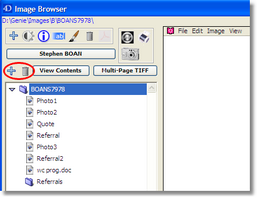
At the top of the Image Browser window is a button which will display the name of the current patient. Clicking on this button opens a Search window, allowing you to quickly switch to another patient's folder. This could be particularly handy when setting up albums. See Creating Albums below for more information.
To view a single image: Click once on the image. This copies it from the server to the TempImages folder on the client.
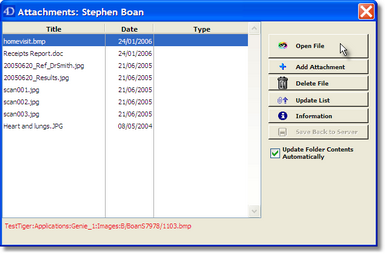
To quickly view the list of images attached to a patient, hold down the Alt key and click on the Image Browser button. This will open an Attachments window. From this window you can select the required image and open it by clicking on the Open File button.
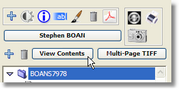
To view multiple images on the one page: Click on the folder containing the images you want to view, then click on the View Contents button.
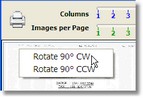
In this window you can sort the pictures by dragging and dropping them into the required position, as well as set the number of columns and the number of images per page that you wish to have on display, by using the Columns slider bar and Images per Page slider bar respectively.
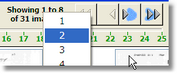
Using the Forward and Back arrows will allow you to move to the next set of images on display. Additionally you can skip to a specific picture by right clicking on the 'showing 1 to 2 of x images' and selecting the image that you wish to view.
Right clicking on the image allows for the rotation of the selected image.
Clicking on the Printer icon will allow you to print the images contained in this window. The Patients name, DOB, current date and file descriptions will be included on this print out. If there is an image on display that you don't wish to print, select the image and click the delete button on your keyboard. This will only remove the image from the current display, it DOES NOT delete the image from the patients folder.
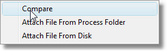
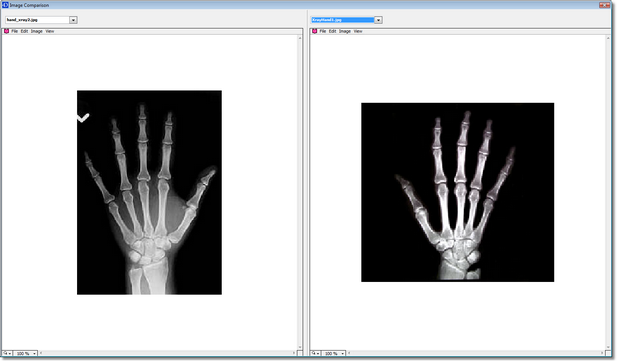
The Deselect Picture is designed for Window machines as it allows you to deselect pictures which are currently highlighted, and difficult to view due to the inverting of colours. To compare images side by side: Right click on the primary image and select 'Compare'.
A split window will appear with a drop down box allowing you to select the 2nd image you wish to use in the 'Comparison'. The images will then display side by side.
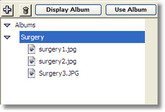
Creating Albums You can also create your own album of favourite photos for use in presentations, or to show the likely results of surgery to a new patient for example.
To add an album, firstly click the Display Album button, and then use the Blue Plus button which becomes active.
To add an image to your album, simply drag and drop it from the patient's display area into the Albums folder.
Note: The Album area is not automatically displayed when the Image Browser window first open. You need to click the Display Albums button to view the contents of the Albums folder.
The Albums folder is actually created inside the Images folder on the server. Albums are NOT patient specific. Albums are created for global use for display purposes or for collating images or photos into particular groups. |