Appointment Preferences


|
Appointment Preferences |
|
|
To initially set up your Appointment Preferences select Appts > Appt Preferences
or click on the Appointment Preferences
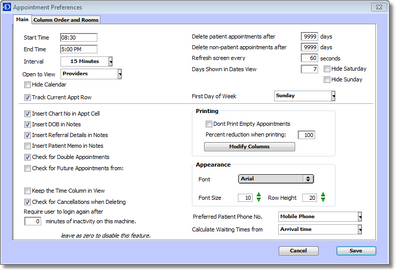
The Appointments Preferences window will open as below:
Start Time: Enter here the time of the earliest appointment you would usually make. End Time: Enter here the time of the latest appointment you would usually make.
Note: Enter the time in 24 hour time mode i.e. 6PM =1800. Appointment Interval This is the length of a normal appointment. If your appointment times vary then enter the shortest appointment interval which will be used. For example, if you are a specialist practice and your new patient appointments are 30 minutes, but your follow-up appointments are 15 minutes, you should enter 15 minutes as the interval. You can later specify new appointments to take 2 appointment slots (See Appointment Types for more information). Hide Calendar Ticking this will change the appointment view between wide and tall format. In wide format, the calendar is not displayed. This can also be changed via clicking once on the date in the calendar on the appointment book.
Track Current Appt Row A yellow highlight will appear on the time if selected in the time column. This allows you to easily keep track of the appointment row selected if you have multiple Doctors entered into the appointments page.
Delete Patient Appointments After X Days This value specifies how long you want to actually keep a patient appointment record in the Appointments book. Most practices would set this to about 180 days (6 months). You can set it to as long as you want, but be aware that if you retain the records for a very long time then the Appointments Book will run more slowly. Each time you click to display a new day, Genie must search through all the appointment records to find just that day’s appointments. Searching through 10,000 records is obviously going to be faster than searching through 100,000 records. When the last client machine quits out of Genie at the end of the day, Genie will delete all appointments older than the specified number of days. This is one of the reason why client computers should quit out of Genie at the end of the day even if you elect to leave the server running.
Note: Naturally, only the actual appointment record is deleted. All billing and clinical records for the day are retained.
Delete Non Patient Appointments After X Days This works in the same way as the 'Delete Patient Appointments After X Days' however, is in reference to all records in the Appointment book that are not marked as patient appointments.
Refresh Screen Every X Seconds If you use Genie as a single user then this setting is irrelevant. On a network it instructs Genie to display changes which may have been made on another computer on the network. The usual setting would be around 60 seconds. The minimum allowed setting is 20 seconds. If a refresh occurs whilst you are typing in an appointment cell then you are “kicked out” of the cell during the refresh. If this occurs often enough to be annoying then you should increase the refresh time.
Note: You can force a screen refresh at any time by clicking on the TODAY button. Open to View The Appointments Book has three different views: Providers, Dates and Rooms. As a general rule specialist practices will probably prefer the Dates view, and general practices will probably prefer the Providers view. This setting just tells Genie which view to open as the default when the Appointments book is opened. You can switch between views at any time by clicking on the appropriate View button.
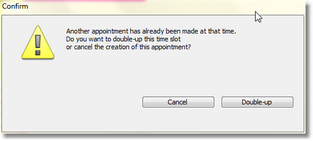
Days Shown in Dates View The Dates view displays appointments with a column for each date. You can specify how many columns you want to see when moving to the Dates view. That is, the number of days ahead you would like to see at any one time. The usual setting would be 7 days. The larger you make this value the slower Genie will be in displaying all the appointments. If you do not wish to include weekends in the Dates View, you can choose to hide Saturday and/or Sunday by ticking the appropriate checkboxes against 'Hide Saturday' or 'Hide Sunday'. First Day of Week This is the first day that will display on the calendar on the appointments page, usually either Sunday or Monday depending on your preference. Inserting Appointment Details Genie allows you to automatically insert a variety of patient details when an appointment is made. These are Date of Birth, Chart Number, Referral Details and Patient Memo. These Notes are only visible when displaying a single provider’s appointments. Check for Double Appointments This alerts you to the fact that another appointment has been booked into that particular time slot already. It then provides you with the ability to decide if you want to double book this appointment, or cancel the creation of this appointment. This is useful in larger practices, where receptionist may be making appointments at the same time.
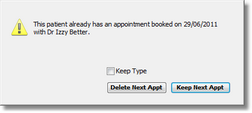
Check for Future Appointments Checks to see if the patient has any appointments booked in the future from either the Current Date, or from the Date which you are making the appointment for.
Keep Time Column in View This is useful for practices which have a large number of Doctor's entered on their appointments page as it keeps the time column in view when scrolling across the screen. Check for Cancellations Alerts you to the fact that there are patients waiting for a cancellation. For more information on how to use the feature, see Cancellation List. Require User to login again after X minutes of inactivity on this machine If a time is entered in this field, the user will be presented with the login window after the specified period of inactivity. They will be required to select their user name and enter their password. In order for this feature to work, either the Appointment window or the Patients list must be left open. Don’t Print Empty Appointments Selecting this option instructs Genie to print only those appointments cells which have been filled. That is, if you have 30 appointment slots in a day, but only have five patient appointments, then only the five appointments will be printed. Most people would not select this option so that they can actually see where the empty slots are on the printed day sheet. Modify Columns This allows you to specify which columns are on view in an individual doctor's appointment view and which columns you wish to print when printing a single provider’s appointments (see Printing Appointment Page).
Note: You must have opened the Preferences window from a single provider’s page for this button to be enabled. Percent Reduction When Printing Printing of the Appointments book is WYSIWYG i.e what you see is what you get, no matter what view you are in. Usually this will mean that the appointments will print out on several A4 pages. You can reduce the printed size here so that it will fit on just one page. Usually somewhere around 70% will do it, although you may have to experiment to get it just right. Appearance Allows you to change the font style, row height and font size of the appointments book. Preferred Patient Phone No. This is the phone number that will display in the providers individual view in the Phone column by default. Calculate Waiting Times From When you register a patient as having arrived in the waiting room by clicking on the Coffee Cup This waiting time can be calculated in two ways. Either by the time between arrival and being seen, or by the time between their actual appointment time and being seen. If you calculate it on the latter method, then the waiting time for a patient that arrives and is seen before their actual appointment time may be a negative number. You should choose the method most suitable to your practice. That is, if you see patients on a walk-in basis, select the Arrival Time option, otherwise select the Appointment Time option. You can switch options at any time and the waiting times will be recalculated for anyone that hasn’t actually been seen yet for that particular day.
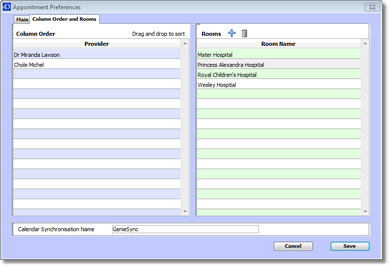
Note: If you open the clinical window prior to entering the patient into the waiting room, the waiting time will be calculated from the actual appointment time, even if your preferences indicate it should be calculated from the arrival time. Column Order and Rooms:
Column Order allows you to sort the order in which the Providers names will appear on the appointment book. Drag the names in the list to reorder. The top-most name will appear as the left-most column on the appointment screen. 'Rooms' in Genie can relate to either the Hospital or Day Surgery where the surgeon operates so that a theatre list can be produced. Alternatively, the 'Rooms' in Genie can be used as a triage system allowing you to know which room a patients is waiting in to see the Doctor. See Rooms for more information.
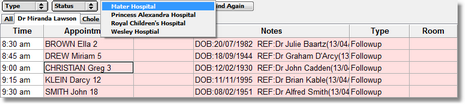
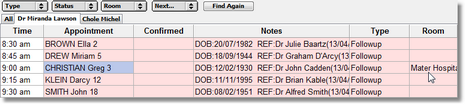
Rooms The Room
The Room column in the appointment book allows you to quickly see which room a patient has been assigned to.
|